A Guide to Flawlessly Packing the Perfect Backpack


You’ve wrangled all the gear for that long-weekend hike. But stuffing it into your pack in a way that won’t make you topple over mid-ascent is another story. An efficient load will help you focus on the scenery (check out our National Parks Checklist), rather than aching shoulders. All you have to do is keep a few key tactics in mind for a fool-proof pack job: weight distribution, easy access, gear grouping and smart attachment.
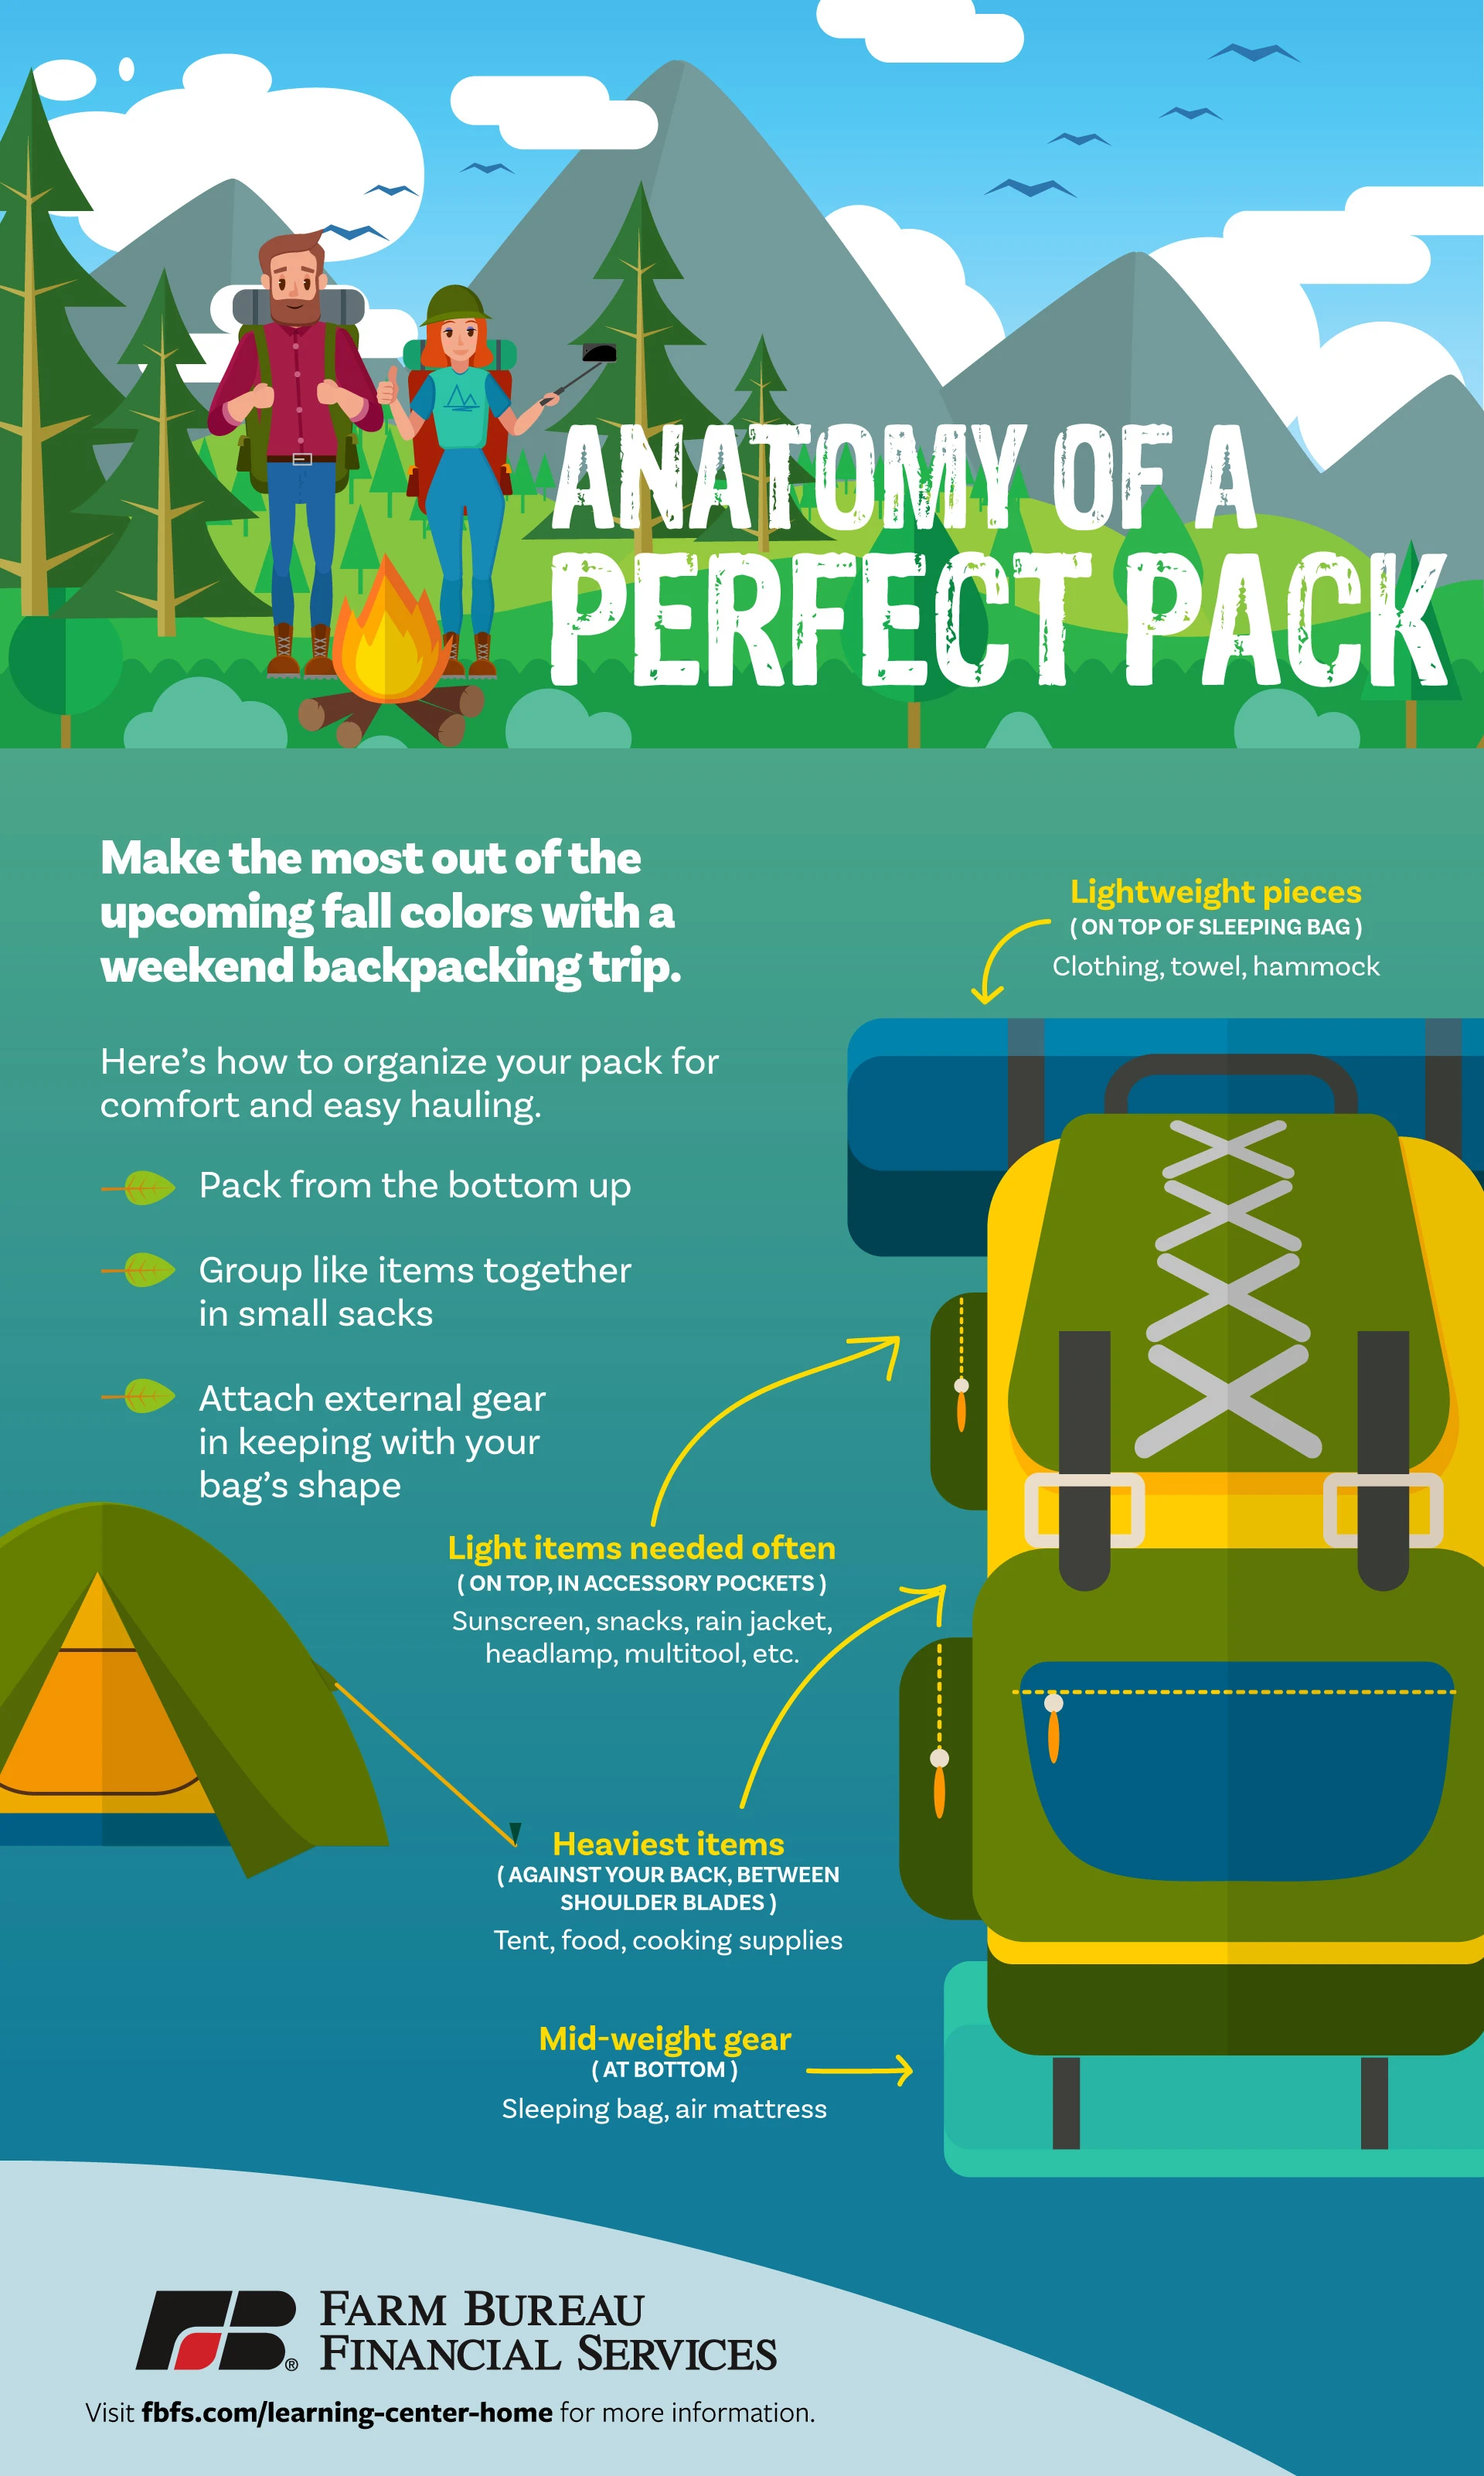
The first rule of weight distribution is to put the sleeping bag on the bottom. It acts as a bolster for the heft of your pack, which you want higher up and next to your body. Next, add in your stash of lightweight items, like clothing, your hammock and anything else you won’t need en route to camp. Now you’ve reached the nucleus of your pack. Your heaviest pieces, like your big food stash and cooking supplies, go in next. Heftier gear should be centered between your shoulder blades and against your back, with medium-weight necessities filling in the rest of that mid-pack space.
If you’re wondering what goes on the very top or in your accessory pockets, it’s anything you’ll need often or just want quick access to. A rain jacket that’s stuck underneath your sleeping bag at the bottom of your pack will do little good to keep you dry during a surprise shower. And you’ll tank if you can’t reach that energy bar when you’re deep into your adventure. Essentials like your headlamp, multitool, GPS, snacks and more should be grabbable so you don’t waste time on the side of the trail, digging through your pack.
Another way to stay organized and keep gear easily accessible is to group like items into smaller zippered or drawstring bags. A food bag, a first-aid kit and a toiletries pouch are all easier to grab when you need something rather than, for examples, a loose spork, a tube of anti-blister balm or your all-purpose camp soap.
Your pack may not be able to hold everything, or you might have wet gear you don’t want mucking up your other stuff. That’s where side compression or rear load straps come in. If you’re attaching gear, just be sure to balance the weight evenly on both sides. Place items against your pack either vertically or horizontally, doing your best to follow its shape. Avoid attaching gear that dangles or swings into you. Aside from being annoying, loose-hanging items can become a hiking hazard.
Not sure of what to bring along for your trip? Try our ultimate family camping checklist.
